Bracelets are raging onto the fashion scene in a big way this season. Chunky seems to be the trend, but it is important to consider the size of your wrist before you start to make a bracelet.
If you have small wrists, use small beads. You can then wear many bracelets together to get the desired 'chunky' look, and on your wrist this look will be the most effective.
If you have larger wrists, then use one strand of large, chunky beads. This look will work best on you, as you can carry off the larger beads well.
Making the bracelet
These are instructions to make a bracelet that is simple and one strand. Keep in mind, that the smaller the beads, the more of them that will be needed for the design. Alternatively, you could use filler beads in a complimentary color to make up the length.
Materials
To make a bracelet, you will need the following materials:
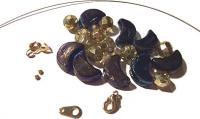
- Needle-nose pliers
- Parrot Clasp
- Necklace Catch
- 2 crimps
- 2 clam-shells
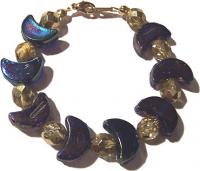
- 8 large feature beads (blue rainbow finished half-moons)
- 9 large feature beads (firepolished gold)
- 10 inches Tiger-tail
- Measuring tape/ruler
Instructions
- Wrap the measuring tape around your wrist until it is tight. Loosen the tape so that two fingers can fit underneath, then record the length. If you do not have measuring tape, then use the tiger-tail to wrap around your wrist. Loosen it so two fingers can fit underneath, then lay it flat and record the length using a ruler.
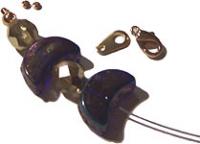
- Thread a clam-shell through one end of the tiger tail, followed by a crimp.
- Squash the crimp right at the end of the tiger-tail, then close the clam-shell around it.
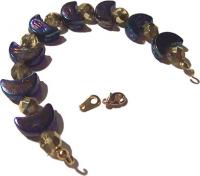
- Pass each bead onto the tiger-tail in this order:
gold, half-moon, gold, half-moon, gold, half-moon, gold, half-moon, gold, half-moon, gold, half-moon, gold, half-moon, gold, half-moon, gold.
- Once each bead is in the correct place, measure the bracelet again. It should still be a quarter of an inch short of the desired length.
- Thread a clam-shell on the other end of the bracelet, followed by a crimp.
- Squash the crimp, and cut off the excess tiger-tail. Close the clam-shell around the crimp.
- Thread the connecting loops of the parrot clasp and necklace catch through the open ends of the clam-shell on either side.
- Close the ends of the clam-shell, and the bracelet is completed!
Conclusion
Put on your bracelet and admire your handiwork. Make another bracelet the same for a friend - or perhaps just many, many more for yourself!
login to post comments
